Creating a Fair Launch on PadTON
Streamlining Your Token Launch: A Step-by-Step Guide to Creating a Fair Launch on PadTON.
White papers, pitch decks… those endless walls of text can’t break the ice between a project and a user who has limited time to learn about them. Here comes PadTON, bringing content into bite-sized, micro-level articles to help our community understand projects better, anywhere, anytime. Let’s dive in!
PadTON simplifies the process for project owners to create their token launches through our user-friendly platform. Below is a step-by-step guide to help you navigate creating a fair launch on PadTON, whether you’re connecting your wallet, creating a token, or finalizing your presale info.
Step-by-Step Guide for Fair Launch on PadTON
1. Connect wallet, If you don't know how to connect your wallet, Click here to see instructions for connecting your wallet
2. At header, Click IDO to go to IDO screen
Go to IDO screen
3. At IDO screen, click on "Apply To IDO" at banner => You will go to https://padton.com/create-fairlaunch
Go to Create Fair launch screen
Form 1: Verify Token
3. Input your token address if you already have one or click "Create token" button to create a new token for the Launchpad.
4. Select Currency ( TON or USDT): Select the currency you want to use for your tokens
TON: Users will pay in TON for your tokens.
USDT: Users will pay in USDT for your tokens.
Currently PadTON supports users to pay in TON, the payment feature in USDT will be coming soon.
5. Select listing option ( Auto listing or Manual listing)
Auto listing: liquidity will be added automatically after Finalize
Manual listing: you have to add liquidity manually and you must choose the listing time (Listing time is calculated in UTC time)
Currently PadTON supports the Manual listing feature, the Auto listing feature will be coming soon
6. Fee option: The project will provide 10% of the total TON raised of the entire project to PadTON
7. Liquidity (%): Enter the percentage of raised funds that should be allocated to liquidity on router. Minimum value is 51%, maximum value is 100%.
8. Affiliate (%): Enter or select the affiliate percentage that the project owner wants to pay to the referrer. Value ranges from 0% to 5%
9. Select KYC :
If the project owner chooses KYC, displays an input for the project owner to enter his contact, the exchange will rely on the contact to contact the project owner for KYC.
The project owner will have to pay the floor a KYC fee of 200 TON -> Refer to the fee table Fee Scheme
10. Review all information in the Verify Token form and click on “Next” to go to form 2 (Presale Info)
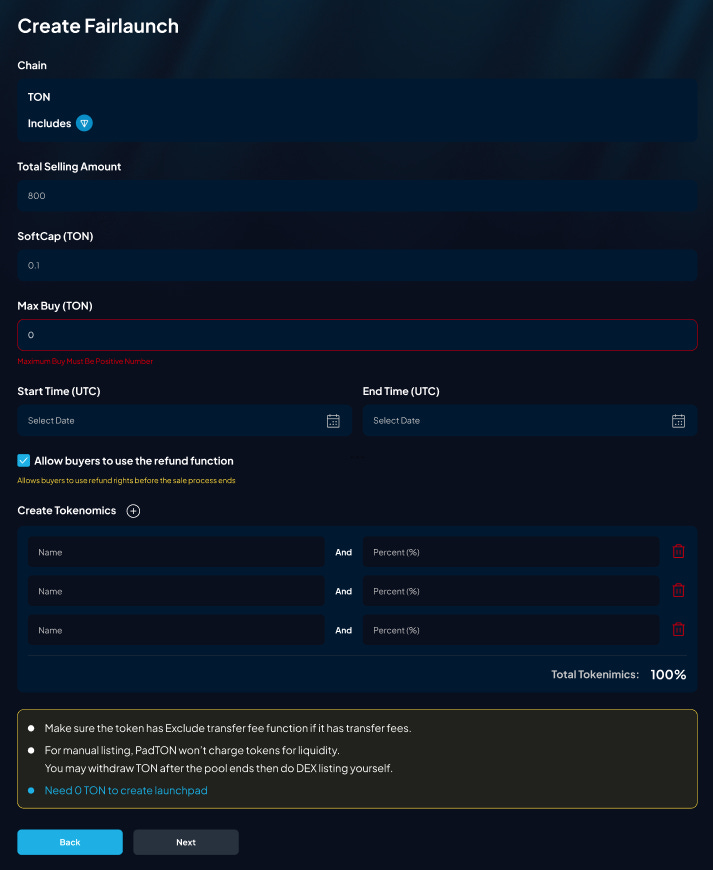
Form 2: Presale Info
Step 2: Presale Info
After verifying your token, you need to input the Presale information that you want to raise. Here are some following important parameters:
1. Input Total Selling Amount (Enter the total amount of tokens for sale, must be greater than or equal to 800 Token
2. Input Softcap:
Softcap must be greater than or equal to 0.1 TON.
Softcap is the minimum level of capital mobilization that a project needs to achieve to be considered successful and continue to implement the proposed plans. If this level is not reached, the amount raised is usually returned to investors.
If the soft-cap is not achieved, the project may be canceled. When the project is canceled, the system will refund the investment
3. Input Max Buy: Enter the maximum number of TON each user can purchase. This value must be positive.
4. Start time:
Choose the date and time to start the token sale (Start time is calculated in UTC time)
The start time must be after the current time and before the End time.
5. End time:
Choose the token sale end date and time (End time is calculated in UTC time)
The end time must be after the start time and before the Listing time.
6. Choose to allow buyers to use the refund function :
When you choose "Allow buyers to use the refund function", buyers will be allowed to refund during the active period of the project
7. Create Tokenomics:
When the add icon (+) is clicked, a new row is added to the form, The system automatically calculates the total value of all "Percent (%)" fields Total Tokenimics = 100% A row includes: - Input field tokenomic name: The field cannot be empty - Input field percent of tokenomic name: Percent of tokenomic name must be greater than 0 and less than or equal 100.
8. Review all information in the Verify Token form and click on “Next” to go to form 3 (Add Additional Info)
Presale Info
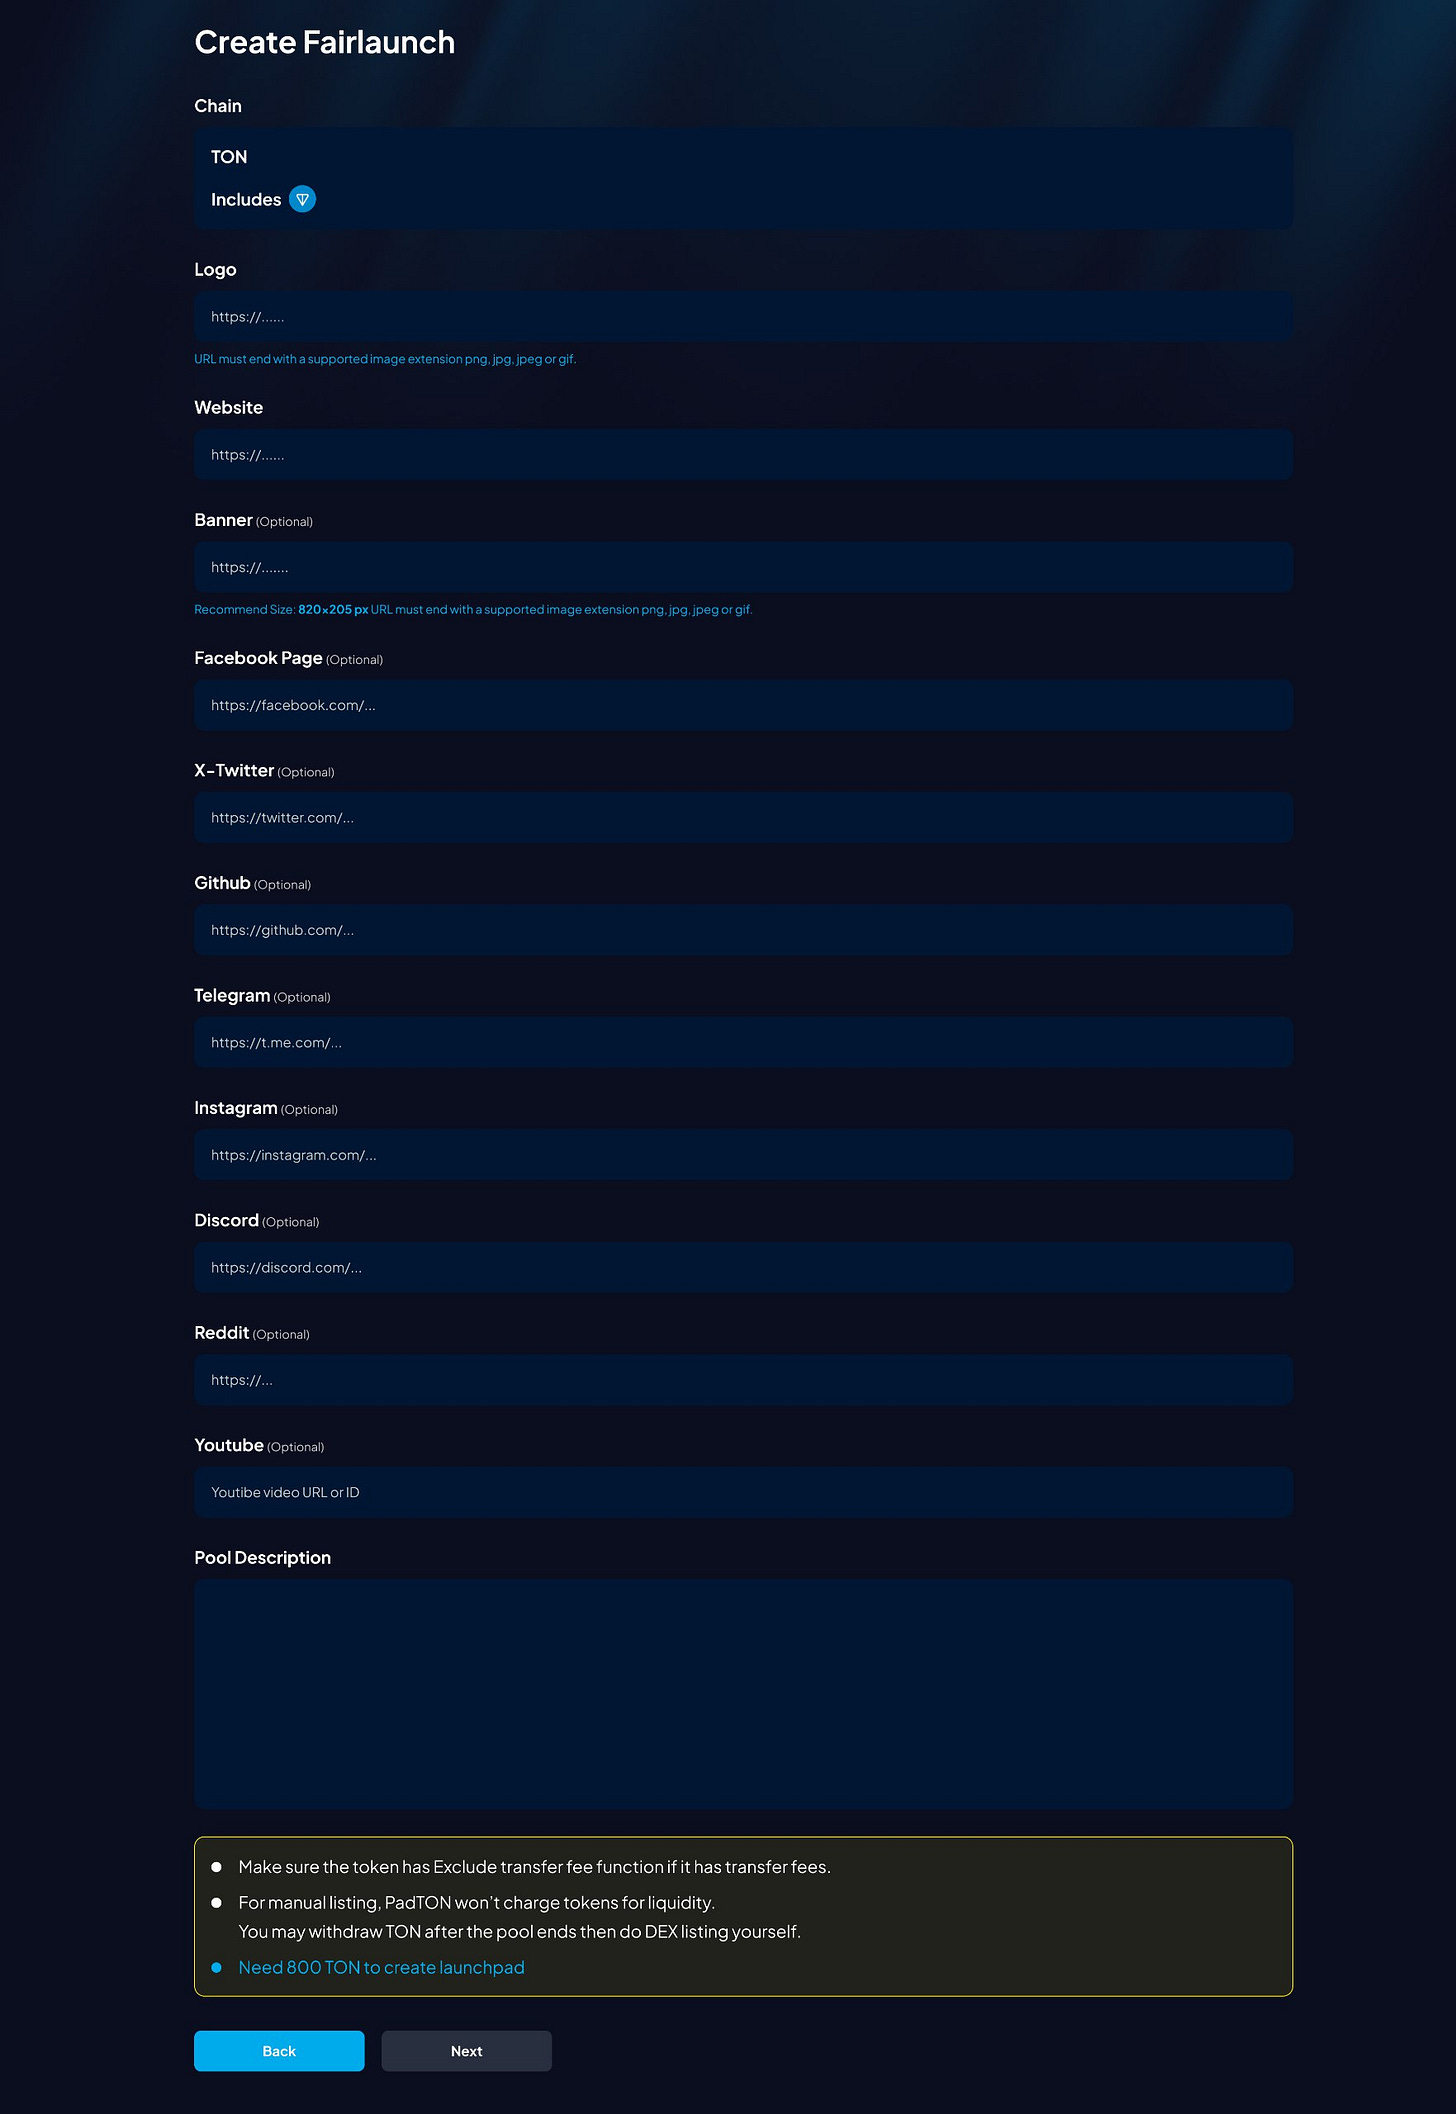
Step 3: Add Additional Info
There are some notes for this step:
1. Logo URL, website and description are required fields, cannot be blank. You can’t complete this step without those.
2. Fields marked as optional are not required
3. Logo URL must end with a supported image extension: png, jpg, jpeg or gif.
For example: https://www.padton/padimg.png
4. Review all information in the Verify Token form and click on “Next” to go to form 4 (Finish)
Review all information in the Verify Token form
Step 4: Finish
This is the final form. You can review all the information one last time before submitting, after you have made sure that everything is perfect, or you can go back to the previous step to make any changes. Click “Confirm & Create Launchpad” and Confirm on your wallet.
After Confirming your wallet, open a popup containing notification content for you, and click close to navigate to the My Project page Check your wallet, if the transaction was successful then your project is being created. Your project will appear in the My Project - Listing tab once the generator is complete, please wait a few minutes.


